
ProductBackground workflow guide
All-in-one: From a Product Photo to a Complete Scene
Start with your product and a scene idea. All-in-one brings scene planning, background generation and product placement into one workspace, so you can move from a reference photo to a complete composition without choosing the background separately.
· 6 min read · ProductBackground
Feature availability and prices can vary. Check the current options in your workspace before starting.
1. Choose All-in-one or your own background
Use All-in-one when you have a product reference and want the application to build the scene around it. Open it directly from the header, to the right of Product Studio, or choose the second mode inside Product Studio.
Use my own background is the first Studio mode and the default when you open Product Studio normally. Choose it when you already have an approved background, have generated one in Create scene, or want to decide exactly which scene to use before placing the product.
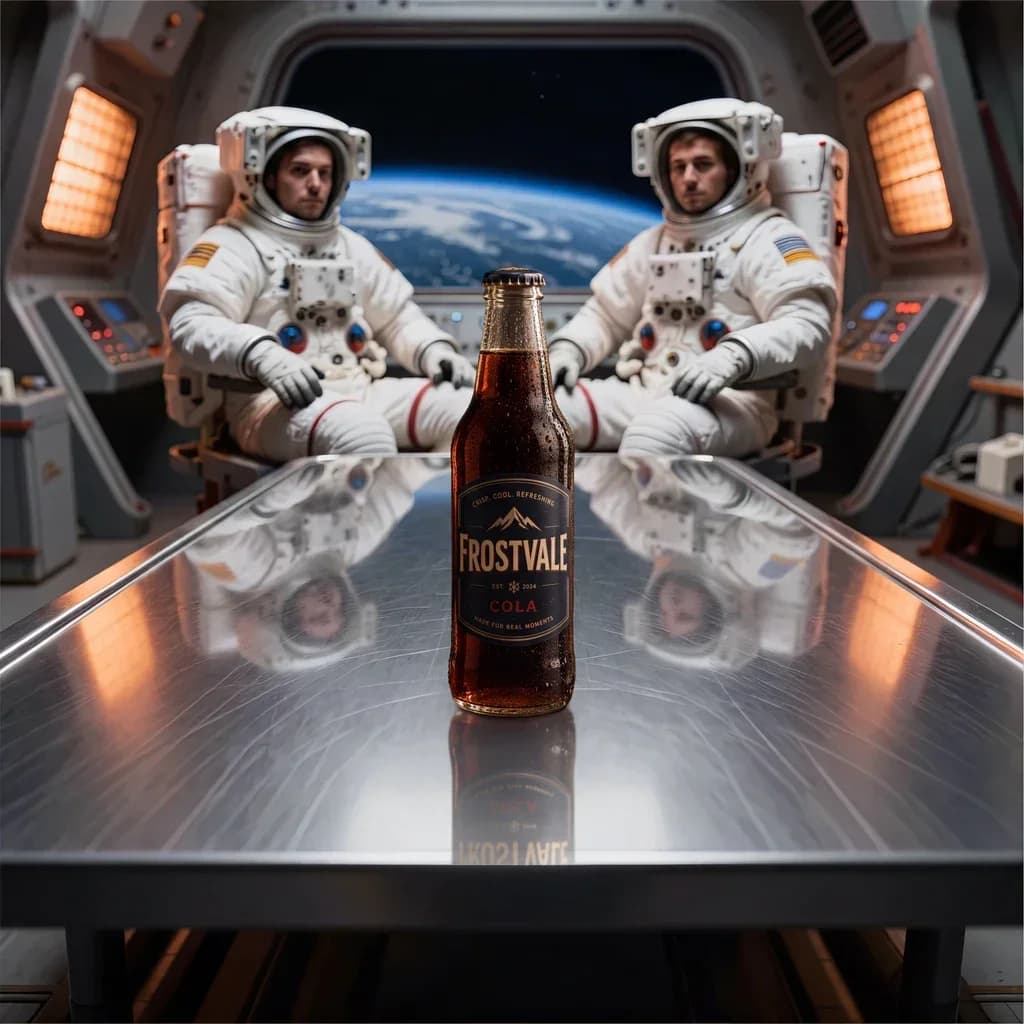
For example, an early campaign concept for a soft drink might suit All-in-one. A composition that must use a particular photographed tabletop is a better fit for the own-background mode. Both approaches still require a review of the finished product.
2. Give the scene a clear product reference
Upload a product photo, take a photo with the camera option, or select a product from your library. Use a view that clearly shows the product shape, label and important materials. Keep the complete product in frame and avoid reflections that hide details you need to preserve.
A simple reference usually communicates more than a busy lifestyle photo. If the label is unreadable in the original, generating more pixels later cannot establish what it should say. Retake the photo before spending time on scene variations. Our phone photography guide explains framing, camera angle and light.
3. Describe the setting, light and surface
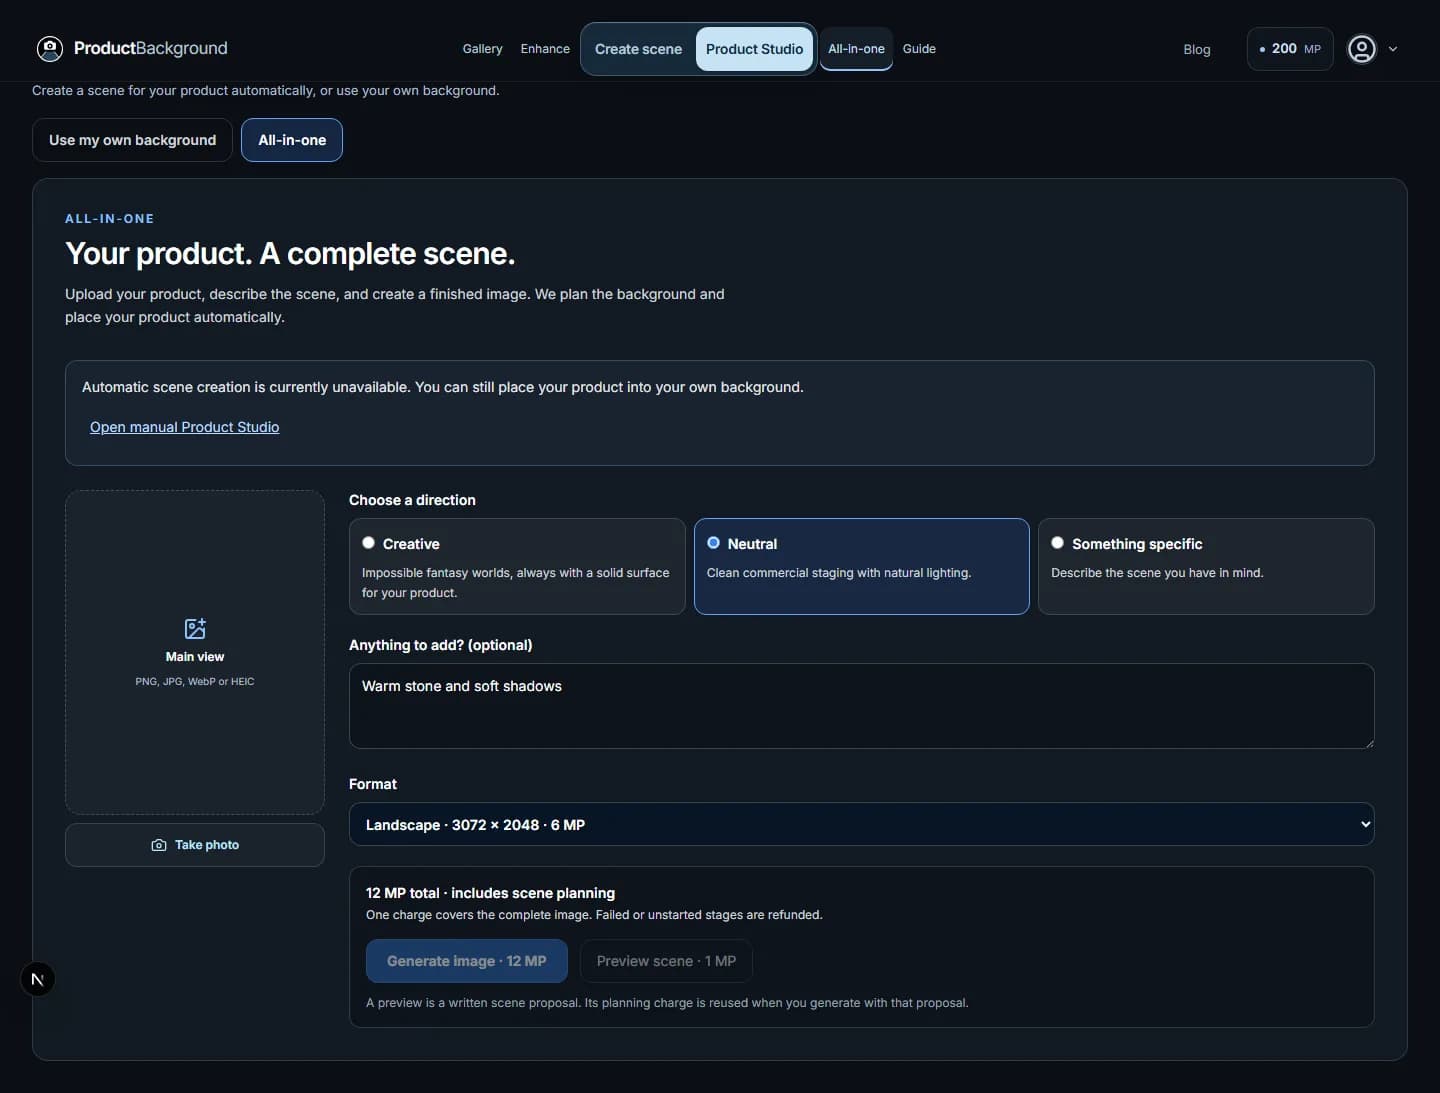
Choose Creative for imaginative environments, Neutral for clean commercial staging, or Something specific when you already know the setting you want. The specific option requires a description; the other directions accept optional instructions.
Describe where the product should sit, the light, and the space around it. A useful brief is concrete enough to guide composition without turning into a list of competing scenes:
A warm limestone platform beside a softly lit window. Gentle shadows, a quiet beige background, and open space on the right for campaign copy.
Select landscape, portrait or square according to the intended placement. Think about the final layout now: a wide website banner and a narrow mobile card need different room around the product.
4. Review the proposal and the current price
Preview scene creates a written scene proposal. It is a paid planning step, not a free image preview. Read it to check whether the proposed setting follows your brief before generating the complete image.
When you generate from the same successful proposal with unchanged product, format and direction, the planning charge is reused. Changing those inputs can make the previous proposal inapplicable. Check the updated total beside the generation button each time.
You can also generate directly. All-in-one then plans the scene, generates the background and places the product. The interface tracks the accepted request. If a request is uncertain and offers Retry same request, use that action: it retains the request identity rather than starting a separate attempt. Failed or unstarted stages are refunded according to the job’s billing result.
5. Inspect the product before using the image
Compare the composition with the uploaded reference. Look closely at spelling, logo placement, proportions, closures, transparent materials and the product’s contact with the surface. Check that shadows and reflections agree with the scene lighting.
All-in-one automates the sequence, not approval. A convincing scene can still contain changed packaging or invented details. If the composition is right but needs a different delivery size or more surrounding space, continue with the Enhance guide. Recheck the image after every enhancement.
Common questions
Can I choose an exact existing background?
Use the first Studio mode, Use my own background. All-in-one generates the background as part of the request.
Why is generation unavailable?
Automatic planning or generation may not be available for the selected format or environment. Follow the message in the workspace; the manual mode remains a separate option.
Is the displayed MP cost the output resolution?
No. Output megapixels describe the image size. The MP total beside the action describes usage charged for the operation.