
How to Turn a 3D Render into a Realistic Product Image
Build the environment, place your rendered object with Nano Banana Pro, and review the result before the final upscale.
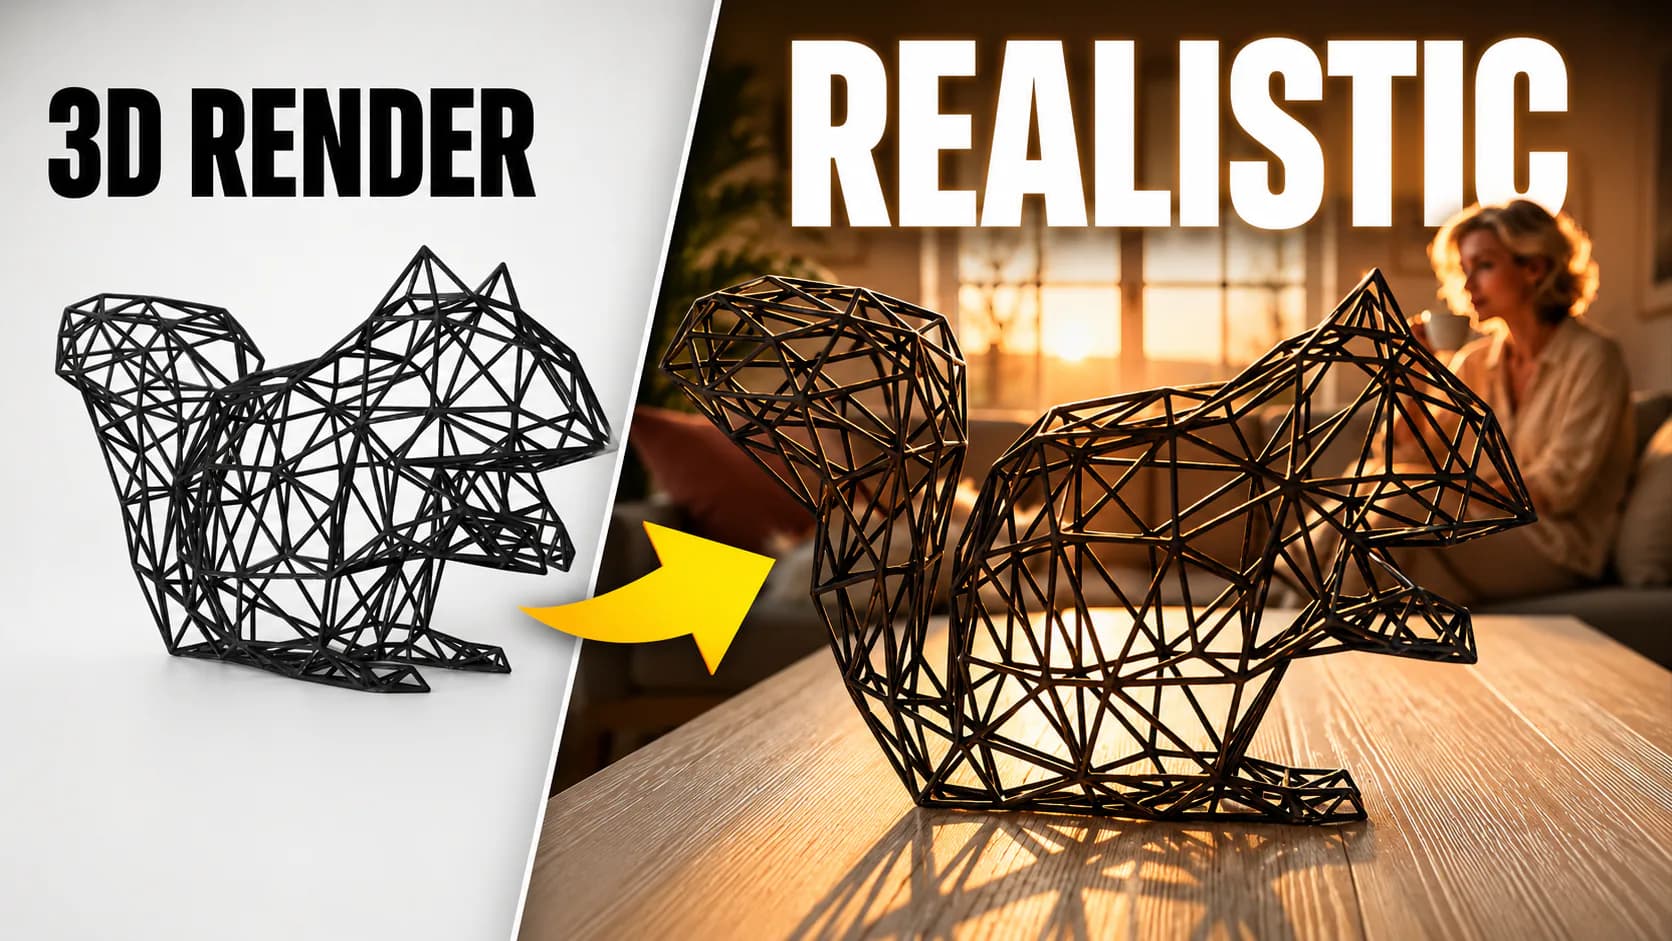
A 3D render can communicate a product's shape clearly without showing how it might look in a real setting. Materials may appear flat, reflections may feel artificial, and the object may lack the lighting and context that make a product image convincing.
In this tutorial, we use ProductBackground and Nano Banana Pro to turn a rendered wireframe squirrel sculpture into a realistic product scene. We build the environment first, expand the background, place the sculpture through Product Studio, and finish with a twenty-four-megapixel image.
The key difference from placing a photographed product is the Realistic 3D object option. It adds art direction asking the model to refine the render's materials and surface appearance while preserving its design.
Preparation
What you need before starting
This workflow uses a rendered image of your 3D object, not the original model file. Product Studio works with image references; it does not import a mesh or edit your material maps.
Prepare:
- A clear render showing the object from your intended viewing angle.
- An optional second view of the same object.
- The object's real-world size, if known.
- An idea of the environment and atmosphere you want to create.
Product Studio accepts PNG, JPG, and WebP images. Choose a reference in which the silhouette, construction, and important details are easy to distinguish.
For a wireframe sculpture, that means paying particular attention to the thin structural elements and the spaces between them. Those details define the design and should remain visible in the reference.
Step 01
Build the scene before placing the product
Start with the environment rather than trying to describe the entire finished product image at once.
Think about three elements: the people or characters in the scene, any animals you want to include, and the surface that will display your product. Then decide on the season, lighting, and overall mood.
For our squirrel example, we choose:
- A woman.
- A Persian cat.
- A black wood surface.
- Spring and Sunset as additional prompt terms.
These choices establish the visual setting before the sculpture enters the image. A background prompt for a similar composition could be:
A lifestyle scene featuring a woman and a Persian cat, with a black wood product display surface clearly visible in the foreground. Spring atmosphere, warm sunset light, natural shadows, and an uncluttered area on the surface for later product placement.This is an example prompt, not a required formula. Adapt the environment to your product and the image you want to create.
Before generating, consider whether the surface offers enough usable space. A beautiful scene is not automatically a useful product background if the placement area is hidden, crowded, or viewed from an unsuitable angle.
Generate the initial one-megapixel image and review the composition.
Step 02
Expand the background with outpainting
Once the initial scene is ready, we use outpainting to create a six-megapixel composition.
Outpainting expands the scene beyond its existing boundaries. This is different from simply increasing resolution: it changes the available composition by adding surrounding image content.
In this example, we expand the environment before placing the product. That allows us to choose the broader framing first, then use the completed background as the visual input for Product Studio.
Check the expanded image before continuing. Look for distracting objects, awkward transitions, or changes around the intended display surface.
You do not need to follow this order for every image. Later examples in the tutorial show product placement before outpainting. The important decision is whether you want to establish the final environment first or expand an already composed product image.
Step 03
Open Product Studio and add the sculpture
Switch to Product Studio and select the six-megapixel background.
Upload the rendered wireframe squirrel as the required product reference. If useful, add a second view of the same sculpture—not another product or a different design variation.
The background and product now have separate roles:
- The selected scene supplies the environment, composition, and lighting context.
- The product reference supplies the object's appearance and identity.
This two-stage process is central to ProductBackground's workflow. You design the environment first, then perform AI-assisted placement inside that selected scene.
For a broader introduction, see our Nano Banana product photography workflow.
Step 04
Add Realistic 3D object art direction
A photographed product and a 3D render can need different treatment.
With a photograph, you may want the existing surface appearance preserved as closely as possible. With a render, you may want the model to improve how the materials react to the scene's light while retaining the object's underlying design.
Click Realistic 3D object in Product Studio. This is an art-direction shortcut: it adds the following instruction to the prompt field.
Render the supplied 3D object realistically in this scene. Preserve its geometry, proportions, design, colors, logos, and camera angle, but refine its materials, textures, lighting, reflections, and surface detail so it looks physically present in the environment.The instruction distinguishes between refining appearance and redesigning the object.
For our squirrel sculpture, the goal is more convincing light interaction and material appearance—not a different silhouette, thicker structural elements, or newly invented parts.
You can add placement direction when needed:
Place it centrally on the surface, with a natural contact shadow and realistic reflections that match the scene lighting.Keep extra instructions focused. Describing a completely new environment at this stage can conflict with the background you have already selected.
Step 05
Set the real-world size and generate
For this example, we enter a product size of fifteen centimetres.
Product Studio uses the size as part of the placement instructions. It helps communicate how large the sculpture should appear relative to the surface, people, animals, and other scene elements.
The size field is guidance for the composition, not a guarantee of measured dimensional accuracy. You should still inspect the result for believable scale.
Click Generate to create the product image.
Nano Banana Pro receives the selected background, the product references, and the art direction. The placement instructions ask it to integrate the object with appropriate contact, lighting, shadows, reflections, and perspective.
Step 06
Review the product—not just the overall image
An attractive composition can still contain product errors. Review the sculpture separately from the scene's overall visual appeal.
For a wireframe object, inspect:
Silhouette
Does the outline still match the original design?
Structure
Have thin elements been added, removed, merged, or thickened?
Open spaces
Are gaps between the wires preserved?
Proportions
Do the head, body, tail, and base retain their intended relationships?
Materials and color
Is the finish believable without becoming a different product?
Contact and scale
Does the sculpture sit naturally on the surface at a plausible size?
Shadows and reflections
Do they agree with the environment's lighting?
Product Studio is designed to preserve product identity, but generative placement does not guarantee pixel-exact fidelity.
If an image requires exact geometry, packaging text, or brand details, use a controlled CGI, photography, or manual compositing workflow for those requirements. More realistic-looking is not always more accurate.
Step 07
Upscale the approved composition
After reviewing the squirrel image, we start the final upscale.
In the demonstrated workflow, doubling the image's width and height takes the approximately six-megapixel composition to approximately twenty-four megapixels.
The distinction matters: doubling both dimensions produces four times the total pixel count.
Upscaling and outpainting serve different purposes:
| Tool | Purpose |
|---|---|
| Outpainting | Expands the scene and changes the available framing. |
| Upscaling | Increases the pixel dimensions of the existing composition. |
The larger image provides more resolution for crops and layouts. However, a twenty-four-megapixel file is not automatically suitable for every medium. Print suitability also depends on the final crop, physical output size, viewing distance, and detail quality.
Inspect the upscaled version again, particularly around delicate wireframe elements. Higher resolution does not remove the need for a fidelity check.
Workflow variations
Two more examples: changing the order of operations
While the squirrel image is upscaling, the tutorial shows other ways to build a finished composition.
A sunset scene with a white marble surface
In one example, a man sits outdoors watching the sunset, with a white marble slab in front of him.
Here, we sharpen the background, insert the product, and then outpaint the scene. This order lets us establish the product placement before deciding how much more of the environment to include.
An ancient cellar with a cat-food product
Another example uses an ancient cellar, a woman, lions, and a stone slab in the foreground.
We increase the background resolution before inserting a cat-food product image, then continue with the final enhancement.
This example uses a product photograph rather than a 3D render. The same environment-first approach applies, but the material-refinement instruction is not automatically necessary. Packaging also needs especially careful checks for altered labels, logos, and text.
Quick answers
Frequently asked questions
Do I upload the 3D model itself?
No. Upload a rendered image of the object. Product Studio uses that image as a visual reference; it does not modify the source mesh or texture files.
Is Realistic 3D object a separate rendering engine?
No. It is an art-direction shortcut that adds instructions for realistic material and surface refinement to the Product Studio prompt.
Should I outpaint before or after product placement?
Either order can be useful. Expand first when you want to establish the environment and framing before placement. Place first when you want to build the final framing around an existing product composition.
Will the result preserve every product detail?
Not necessarily. The workflow aims to preserve identity, but details can change. Always compare the generated image with the original reference before using it.
Your next image
Try it with your own 3D render
Start with a clear product reference and a scene that gives the object room to stand out. Add Realistic 3D object, provide scale guidance, and review the result before moving to final enhancement.
Experiment with different environments, materials, and lighting to find what works for your design. Change one element at a time so you can see what improves the image.